

How To Repair Plaster Archtectural Molding
A huge part of the appeal of ownership a period property is undoubtedly its original features – fire places, wooden beams, sash windows and, what nosotros are going to focus on here, ornate plaster mouldings.
Throughout the years, mouldings like cornicing, ceiling roses, skirting, dado and picture show runway will probably have been smothered with layer upon layer of paint and may take lost some of their effectively detailer, but bringing them back to their former glory is a job that any not bad DIYer can achieve...
For more than advice on all your DIY jobs get and check out our dedicated decorating hub page.
You will need:
- Sponge
- Spray canteen
- Pocket-sized scraper
- Toothbrush
- Paint stripper
- Stabilising solution
- Paint
- Paint brush
- Cocktail stick
- Heavy-duty gloves
- Goggles
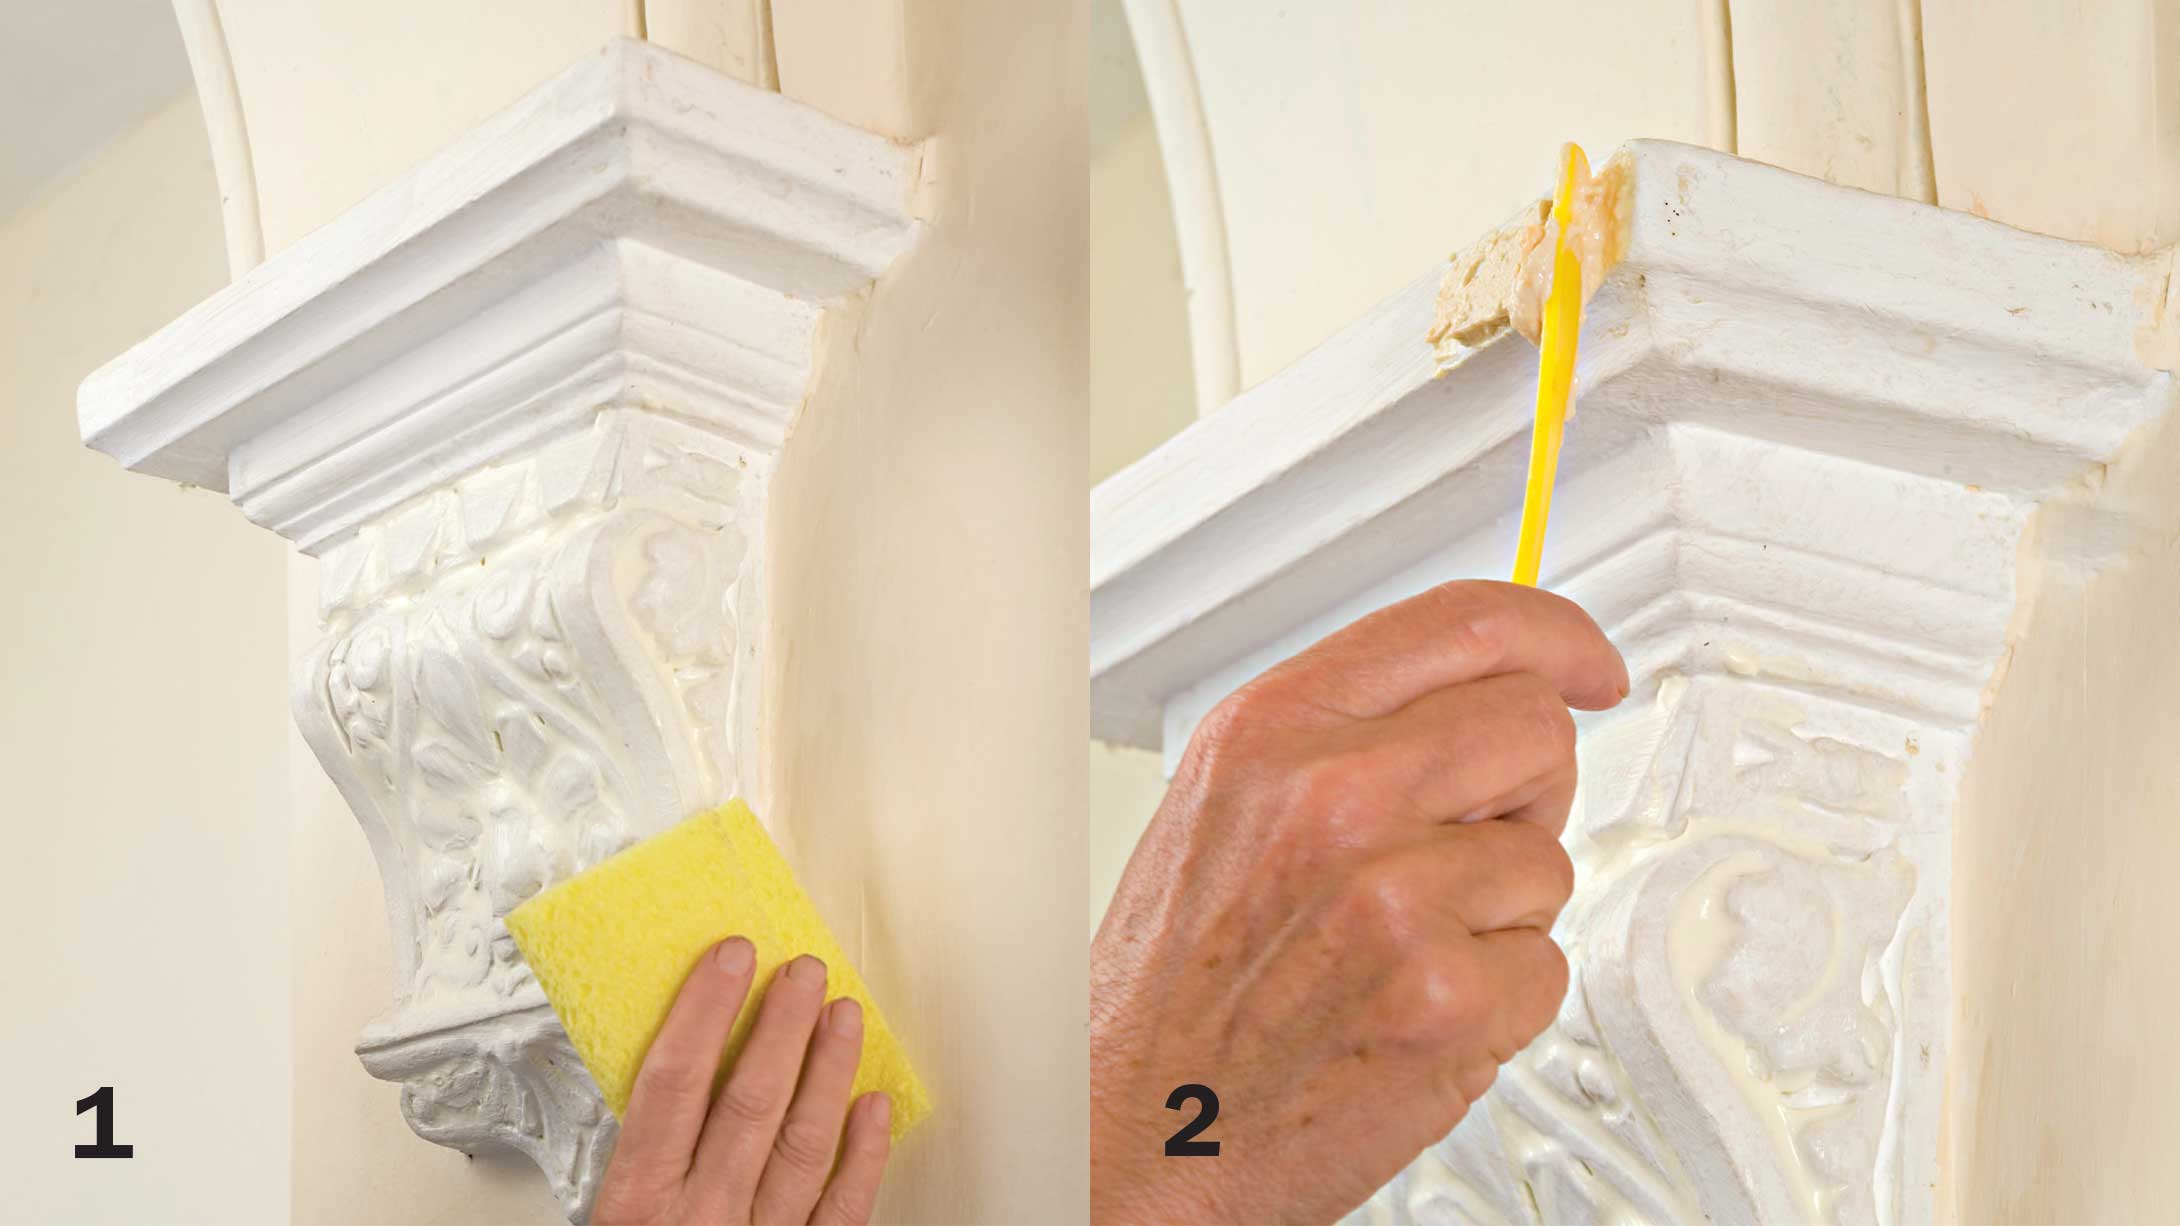
1. Find out what the surface coating is
To test whether the build-up of coating is distemper or paint, spray the plasterwork with plant spray or wet it with a sponge. Leave for a few minutes. If the surface turns grey and softens and can hands exist scraped abroad, then the coating is h2o-soluble distemper, otherwise you're working with pigment.
(Image credit: Colin Leftley)
two. Test paint stripper on pocket-sized area
If the plasterwork has a paint end, apply stripper to a small test surface area. Be conscientious, equally many different materials have been used over the years to make mouldings, and some might not exist uniform with stripping compounds. In a very sometime building you could discover an original pigment of historical significance.
3. Apply paint stripper
Protect the floor surface below and put on heavy-duty gloves. When tackling cornicing or a ceiling rose, exist sure to protect your eyes with goggles. Utilise stripper. How thickly it should be applied depends on how thick the coating is that needs to be removed. If very thick, yous may need to apply two coats.
(Image credit: Colin Leftley)
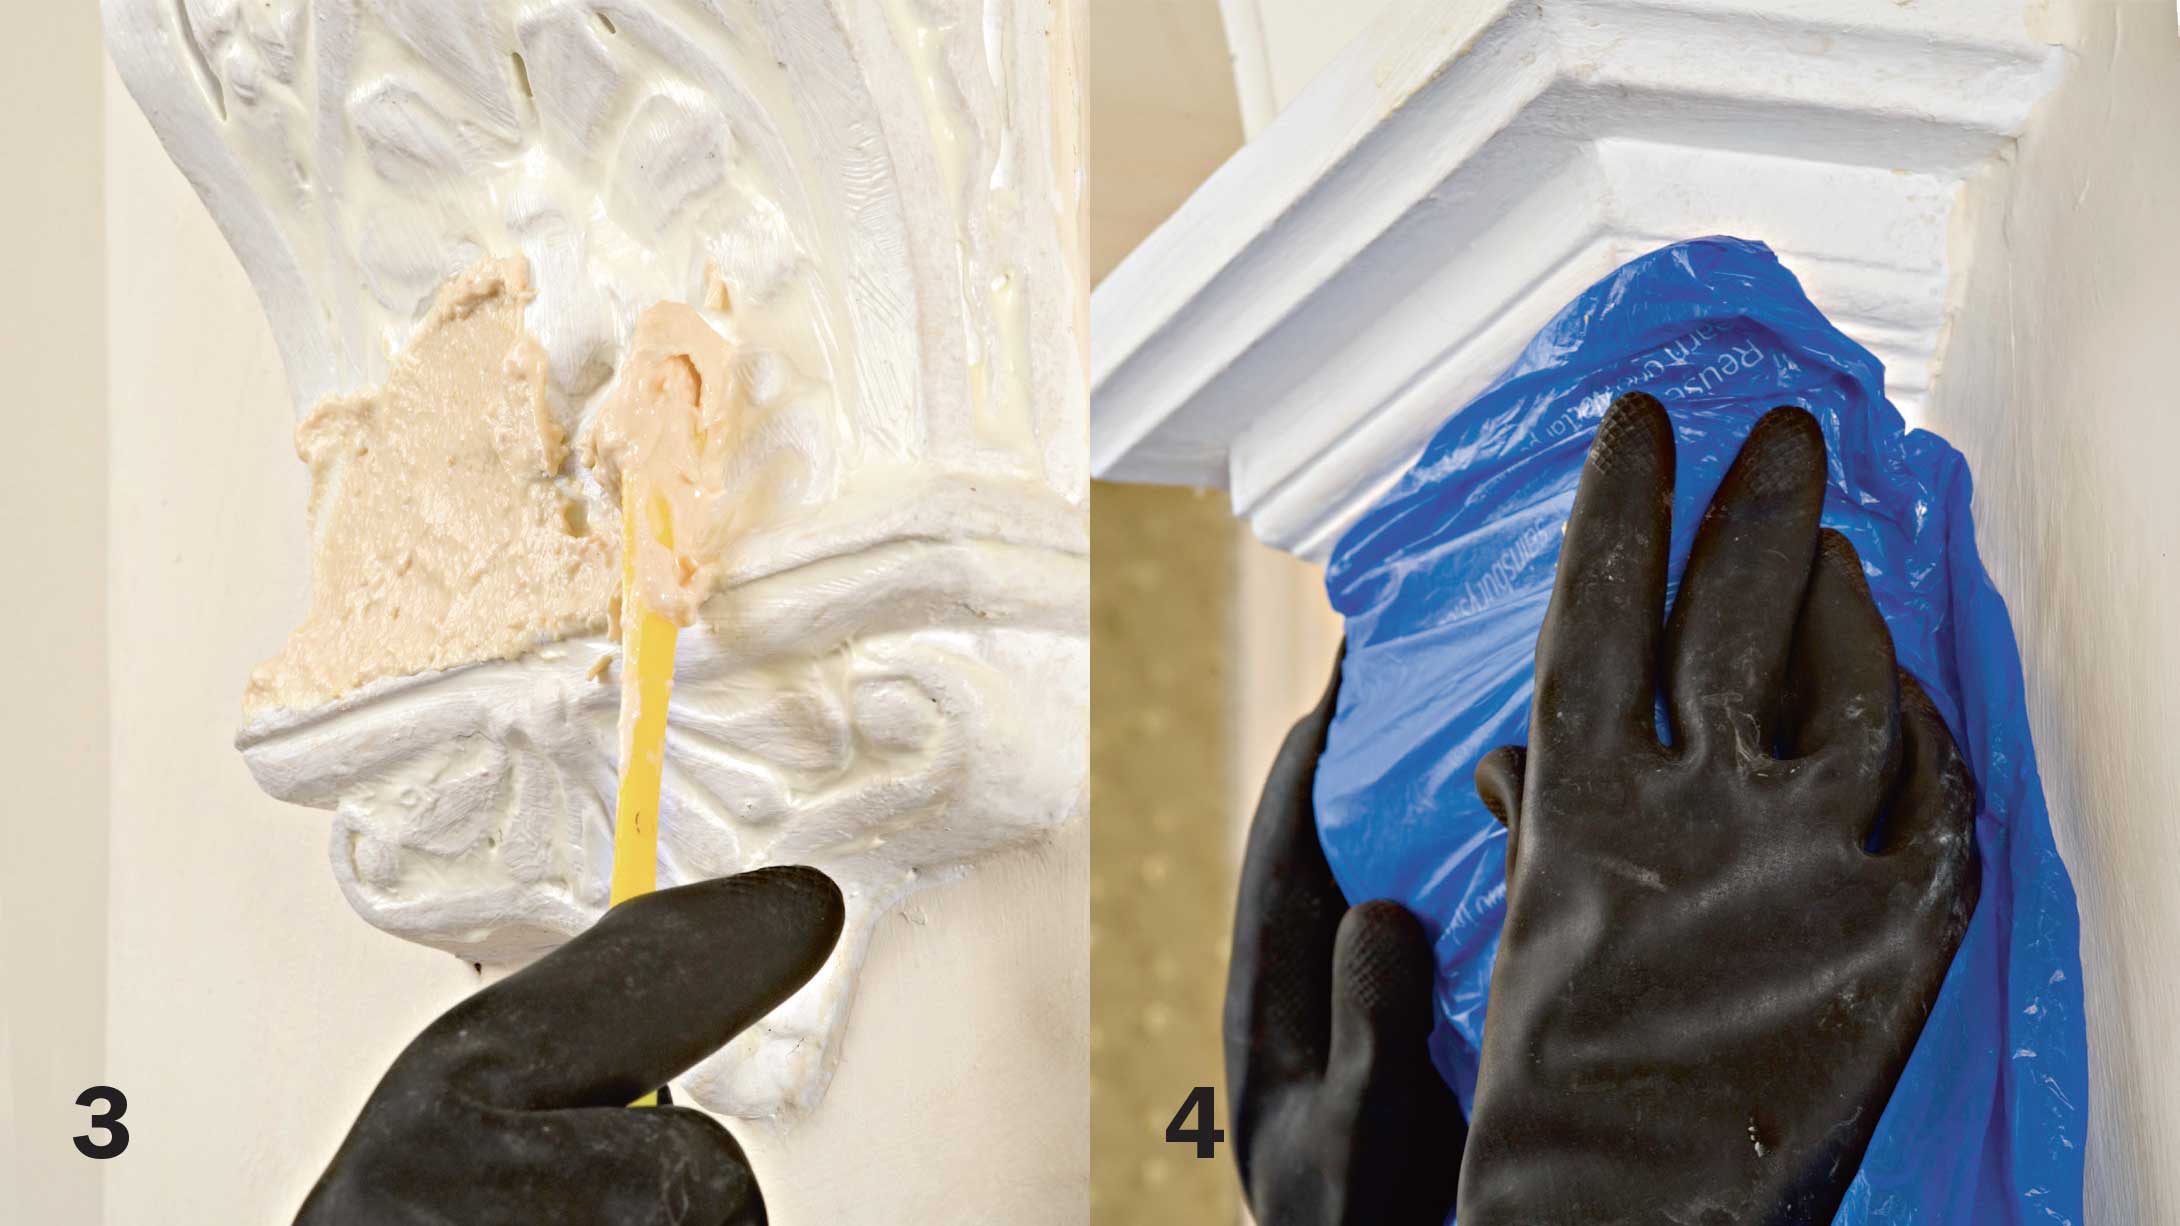
4. Comprehend and await for the layers to soften
To prevent poultice stripper drying out, cover the plasterwork with cling film or discarded plastic bags. Exit for any time between a few minutes and several hours, even overnight if the paint is very thick (read instructions). Check from fourth dimension to time until the stripper has softened all the paint layers.
5. Peel away the softened paint
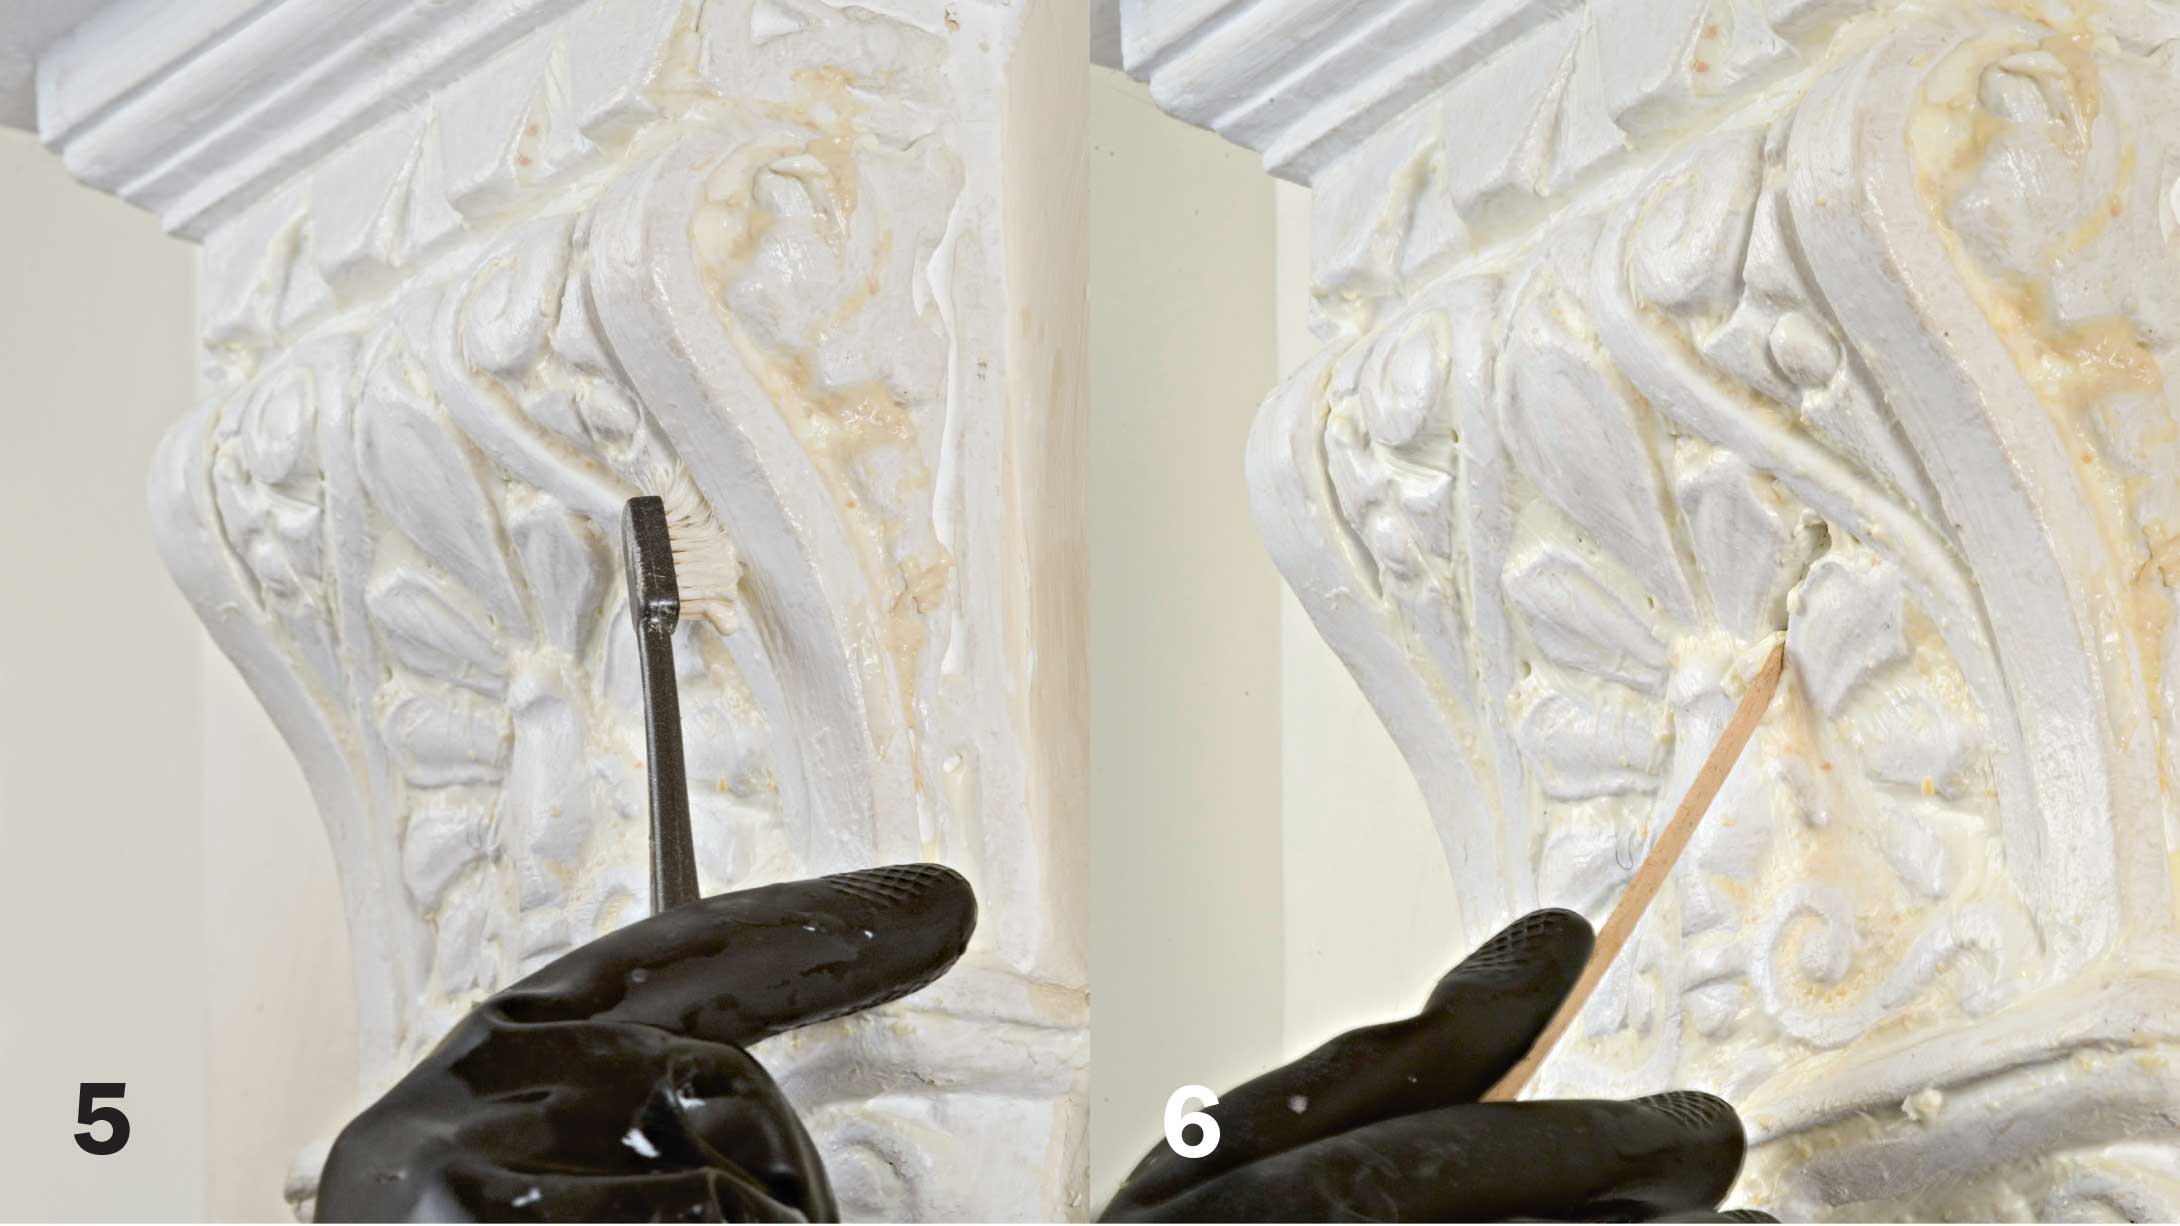
When you lot are satisfied the paint layers have all softened, skin away the covering. The majority of the stripper and softened pigment should pull abroad from the plaster. Use an old toothbrush to go into recesses. If some sections evidence stubborn, y'all tin can apply more stripper, cover and once again leave to soften.
(Image credit: Colin Leftley)
More from Period Living

Period Living is the Great britain'south acknowledged menstruation homes magazine. Get inspiration, ideas and advice straight to your door every month with a subscription.
A cocktail stick is useful for getting into the nooks and crannies and revealing fine item. Be inventive and raid the kitchen to find other appropriate tools. Always pocketbook upwards and dispose of the sludgy paint thoughtfully. Old oil paint used to contain a small amount of lead, so should exist handled with intendance.
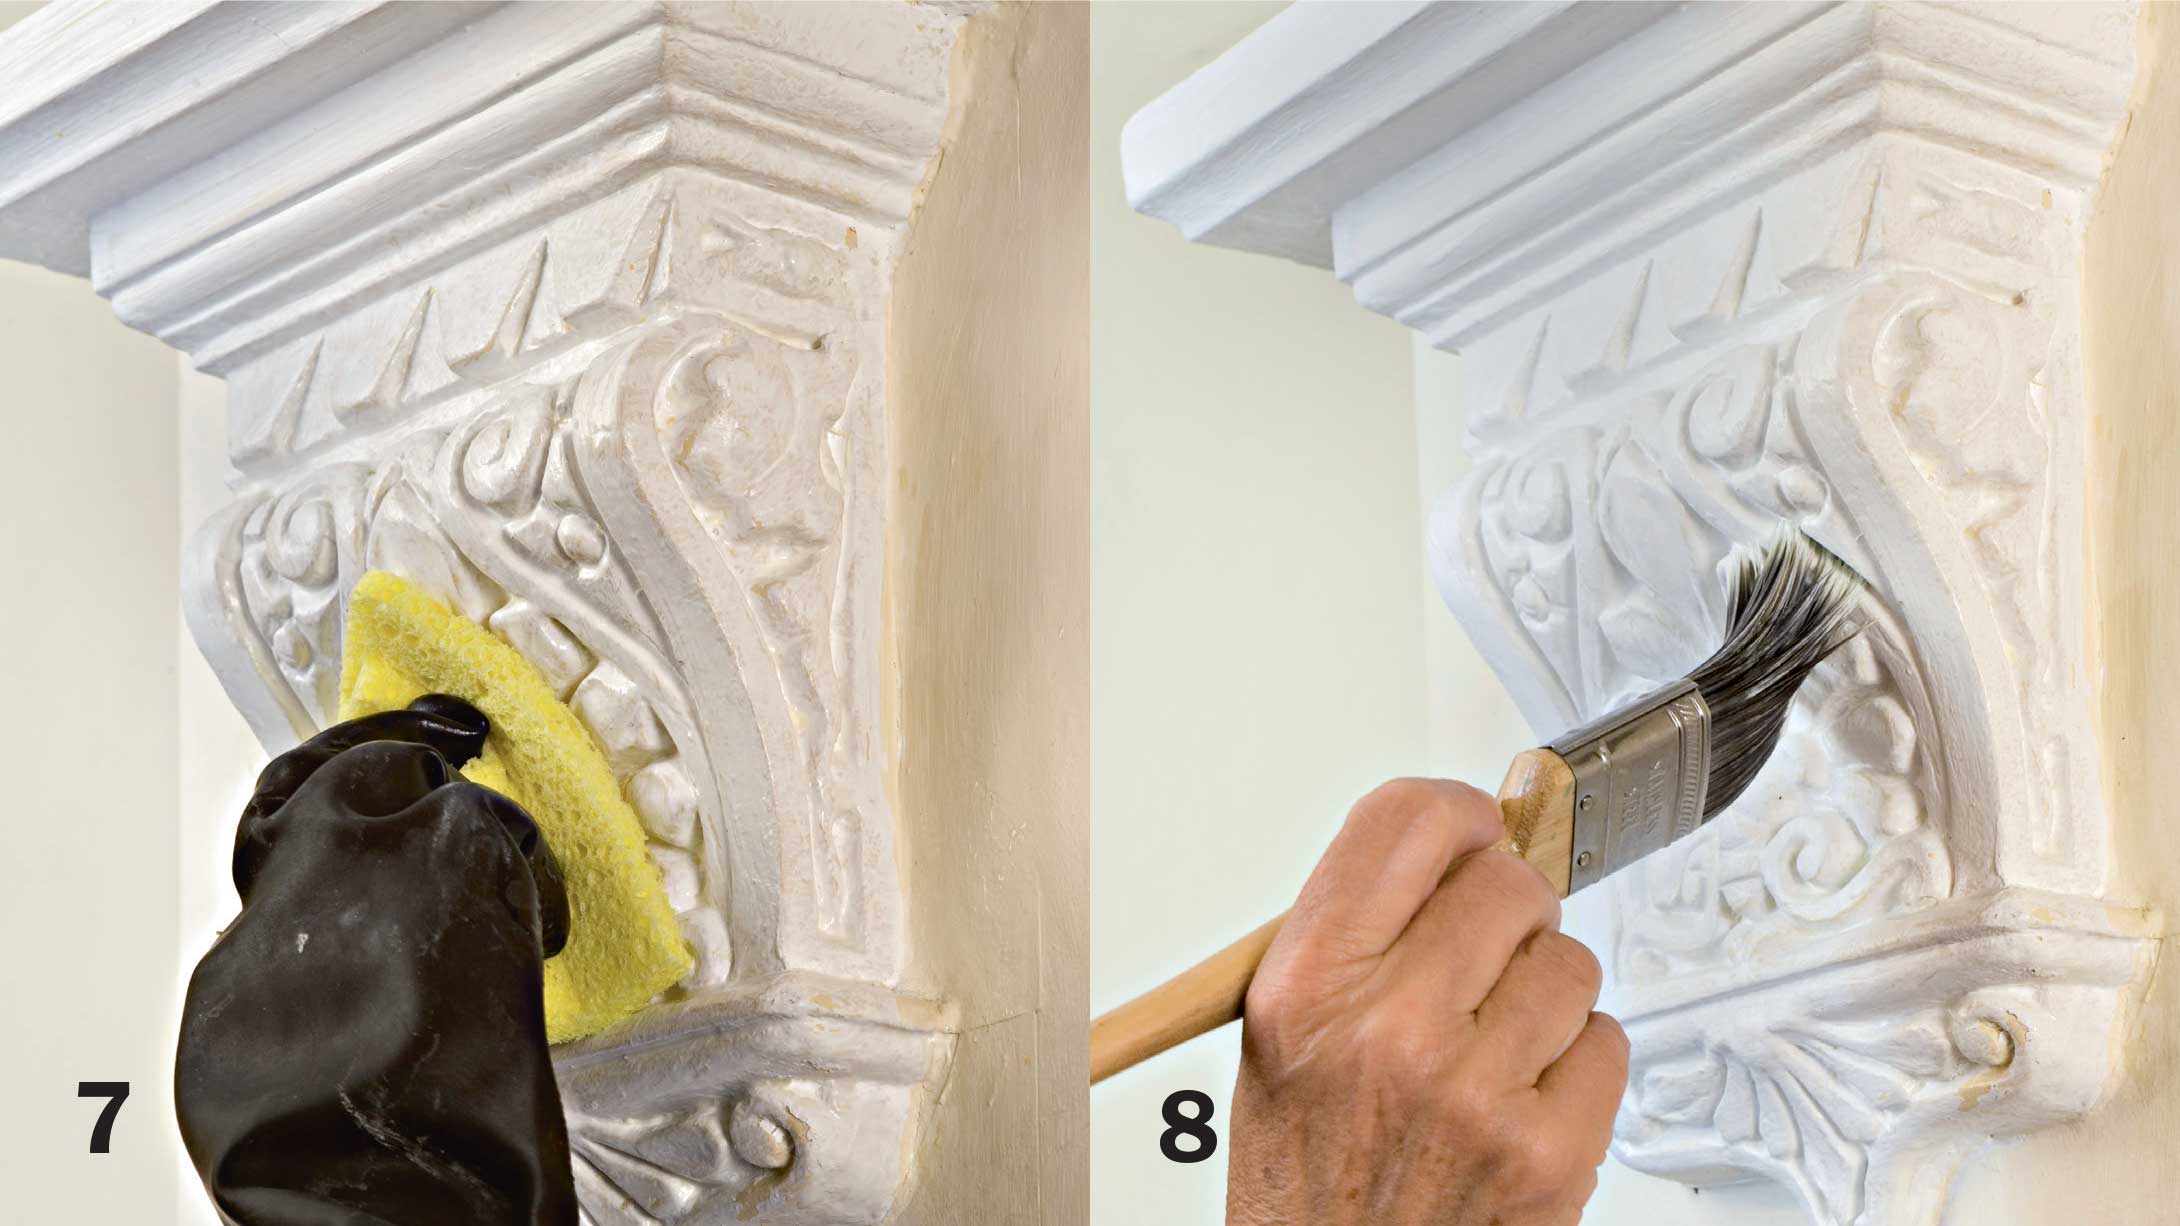
7. Clean the plaster and allow it to dry
Once all of the paint has been removed, neutralise the effect of the stripper past washing the surface with clean water and a sponge. Go out several days before painting to brand sure it's thoroughly dry out.
If cracks are revealed, make good with plaster filler. Toupret makes a range of flexible fillers.
8. Add a fresh coat of pigment
If the original finish was distemper, apply a coat of stabilising solution to demark whatsoever traces remaining earlier painting the surface.
When choosing a paint, carry in heed that modern paint volition not attach to powdery soft distemper and volition before long brainstorm to flake off.
(Image credit: Colin Leftley)
Looking for more than repairs and DIY projects?
- How to make clean, repair and repaint old fe railings and gates
- How to clean and seal stone floor tiles
- How to patch and repair old plaster
- How to repair wood rot

Source: https://www.realhomes.com/advice/how-to-strip-and-repaint-original-plaster-mouldings
Posted by: bennettnoce1980.blogspot.com
0 Response to "How To Repair Plaster Archtectural Molding"
Post a Comment